Photo by @kaylinb1231
The following backpacking checklist pinpoints all the things you need to think about before and after your trip, as well as essential gear items to have in your pack. We start off with the list and continue with a description of each individual item. If you want to download the list a PDF, click here.
Backpacking Checklist
Click here to download this backpacking checklist as a PDF.
Trip Planning and Preparation
| Figure Out the Logistics | Plan Your Resupplies |
| Check the Weather Forecast | Distribute Your Gear |
| Alert an Emergency Contact | Get Insurance |
| Map Out Water Sources | Make a Budget |
Backpack
| Pack (~40-65L capacity) | Pack Liner or Pack Cover |
Shelter
| Tent | Stakes |
| Fly/ Rain Tarp | (optional) Guylines |
| Poles | (optional) Footprint/ Ground Cloth |
Sleep System
| Pillow (inflatable) or Lined Stuff Sack | Sleeping Pad |
| Sleeping Bag | (optional) Sleeping Bag Liner |
Kitchen
| Cup (~750ml) | Fuel (Propane or Alcohol) |
| Spork | Lighter or Waterproof Matches |
| Stove | Hand Sanitizer or Soap |
Food and Water
| Food (~2 lbs per day) 31 Food Ideas | Bottle (1L for Dirty Water) |
| Water (carry 1L minimum at all times) | Filter or Purification Drops |
| Bottle (1L for Clean Water) | (optional) Stuff Sack (~10L capacity) |
Clothes
| Top Layers | Rain Shell |
| Bottom Layers | Headwear/ Bandana |
| Underwear | Trail Runners or Boots |
| Socks | Camp Shoes |
Navigation
| Map | Compass |
Light
| Headlamp or Flashlight | (optional) Extra Batteries |
Toiletries
| Toothbrush | Toilet Paper |
| Toothpaste |
First AId Kit
| Tweezers | Duct tape |
| Bandaids | Pain reliever/other medicine |
| Antiseptic wipes |
Accessories
| Watch | Bugspray |
| Knife | Phone/camera |
Optional Extras
| Towel | Sunscreen |
| Trekking Poles | Sunglasses |
| Gaiters | Lip balm |
| Ear Plugs |
Once You're Back
| Wash and Store Your Gear | Record Your Memories |
Before You Head Out
📅 Figure Out the Logistics
First, pick the hike you want to do and the direction you want to go, the season and month you’re beginning your hike in may influence this decision. Then, check trail conditions and do some research into the parking and logistics of getting to the trailhead ahead of time.
How are the roads? Are there any current closures? Are there shuttles in the area? What's the parking situation like? Can you park your car overnight, and what passes and permits are required for the area?
Since you might lose cell reception on the drive to the trailhead, it’s also not a bad idea to have a print-out of the directions and a map of the area.
Our free trail guides contain all the information you need to know.
⛈️ Check the Weather Forecast
Temperatures won’t be the same at ground level vs. 3,000 ft. up a mountain. Even in the desert, temperatures can range reaching into the 100’s during the day and down below freezing at night, which means you’ll need a variety of clothing for your hike.
Moisture-wicking, quick-dry fabrics are a good place to start and packing extra socks, liners and layers are valuable to change into for avoiding hypothermia in wet or sweaty conditions.
Checking weather predictions and average yearly temps ahead of time will give you some ideas into what to expect, and from there you can zero in on footwear and any extras you’ll need (sunglasses, sunblock, gaiters, etc.) by looking into the climate and terrain of where you’ll be hiking.
📞 Alert an Emergency Contact
Whether going on a day hike, an overnight backpacking trip or beginning the first leg of a thru-hike, informing someone about your plans ahead of time is always a good strategy. Nature can throw some curveballs your way, and in case you do get injured, lost, or don’t return on the day you originally planned for, it’s reassuring to know there’ll be someone to send out the search parties.
Here are three things you should share with a family/friend prior to beginning your hike:
- A detailed trip plan
- A map with the exact location of where you’ll be hiking
- When you think you'll be back
To avoid having search parties sent out looking for you, be sure to let your family, loved ones or whoever you designated to be your contact person know that you’ve made it home safe and sound following your trip.
Hiking Hack: Cairn App is a great new real-life tracking app that allows you to select a “safety circle” you can share your hiking progress and location with in case of an emergency. It also automatically alerts your circle in case you’re overdue from your trip.
🚰 Map Out Water Sources
One of the most important things to locate on a trail is available water sources, especially if you're hiking in dry desert climates where water is especially sparse.
Knowing how many miles lie between water stations will help you determine how much water you’ll need to carry on you between re-fills. It’s also important to consider your water purification system, whether that be drops, a filter, boiling, etc.

📦 Plan Your Resupplies
Food resupply can either take a little or a lot of planning, depending on how you go about it. Since you only have so much room available for food at a time, you’ll need to come up with a system for restocking your food supply along the way. Whether you stick with one method or combine a few, here are some of the most popular food resupply options:
- Buy food at towns, gas stations and resupply points along the trail.
- Set-up a “bounce box” where you take what you need and put the rest back in the box and keep mailing it ahead from point to point.
- Have food boxes arranged ahead of time to get shipped and held at post offices.
- Have someone drop food off at certain locations for you to pick up.
- Rely on hiker boxes and eat whatever’s available (not necessarily the most reliable plan.)
- “Cache” your food: stash food at certain points along the trail ahead of time for pickup.
🤝 Distribute Your Gear
If you’re hiking with a few mates, then why not disperse the weight? Chances are there are a few heavy items you’ll all want to use, and hiking is definitely the time to adopt the sharing is caring mentality. Plan ahead with your group on who’s bringing what.
You can even trade off on carrying things like the stove, the bulk of the water or food supply or any other items that could be mutually used among the group.
📝 Get Insurance (Optional)
Planning an exciting excursion abroad? Trip insurance could be one of the most important purchases you make prior to your backpacking trip. There are several different plans you can choose from, and it can be worth the peace of mind knowing you’re protected against accidentally racking up a whopping $50,000 medical bill overseas. Here’s a further look into why trip insurance may be right for you: The 5 Best Travel Insurances.
💲 Make a Budget (Optional)
Living in the great outdoors should be cheap, right? Not necessarily. Buying the proper gear, supplies, and food ahead of time can add up quickly, and if you’re planning to be gone for an extended period, you’ll also have bills back home to account for months in advance. Creating a budget can help lay out a plan and manage your finances. Some key things to consider when planning your budget include trip length, transportation and travel costs, bills, food, lodging, misc. expenses on the trail, your emergency cash stash and costs of buying gear.

The Cairn App automatically notifies your "safety circle" if you haven't checked in in a while.
Backpacking Essentials
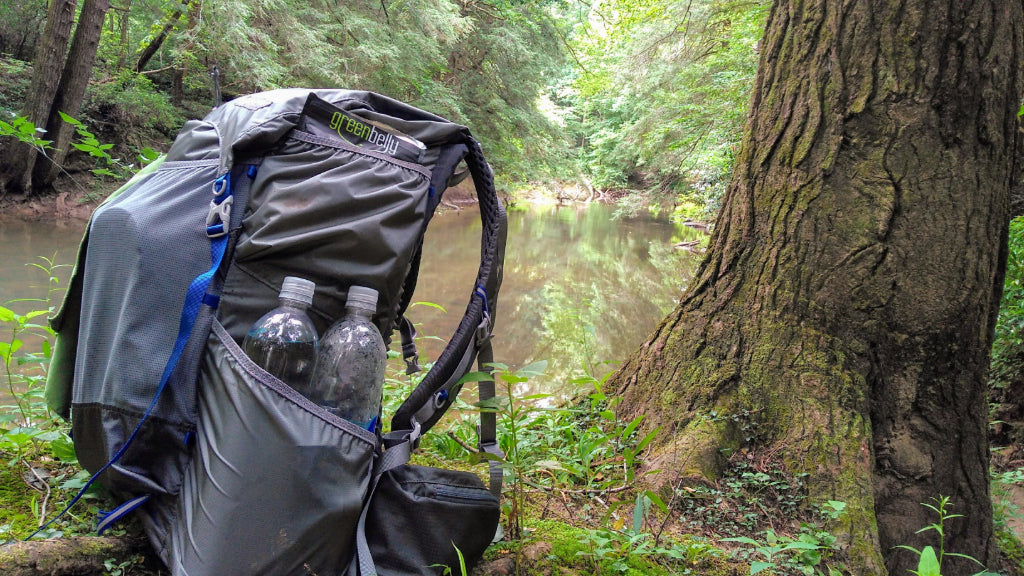
🎒 Backpack
Your backpack is one of your most important pieces of gear. Make sure to choose a pack that weighs less than 2 lbs, rests comfortably on your pack and is made of a breathable material like Dyneema or nylon. As for capacity, we recommend 40L to 65L, depending on the length and duration of your trip. And remember, the bigger the pack, the more stuff people tend to shove in it and the heavier their pack ends up being.
A liner helps protect your backpack and its content from the rain. If you don't own a liner, you can use a trash compactor bag instead. It is just a effective.
⛺ Shelter
Trail shelters, tents, tarps and hammocks all can work for shelter. However, depending on the environment you’ll be spending your nights in one option may certainly be preferable over the other. Bugs, weather, and terrain can influence shelter selection.
Relying on camp shelters can be hit or miss in availability.
Hammocks are great on saving weight—as long as you’ve got somewhere you can hang them.
Tarps can work, but the no walls thing can be a bummer.
For harsher climates ultralight tents can come in handy and are surprisingly durable, however, they can cost a pretty penny.
🛏️ Sleep System
Sleep systems consist of a sleeping pad, sleeping bag, a liner and a pillow (if you want one).
The sleeping pad is your comfort and protection from the ground. It’s advised to test it out ahead of time in a few different settings to ensure it's comfortable and has enough insulation. Sleeping pads come in a variety of lengths, thicknesses, and they can be inflatable or foam.
Sleeping bags should fall between 1-3 pounds. Depending on the environment and temperature range you’ll be in, you can choose between down or synthetic insulation, a summer, three-season or winter bag, and the style (mummy, quilt, rectangular, etc.).
Liners are a good way to keep the inside of your sleeping bag clean and provide some extra insulation, although not indispensable.
🍳 Kitchen
Cooking equipment is all about ease and multi-purpose use. Take a spork, for example. The little utensil is light, practical, and gives the best of both worlds. On the note of utensils, plastic silverware can be tempting over steel or titanium because of its weight and cost, but it’s not durable.
You’ll also want to pack a good cutting knife, dishware (a steel cup or bowl should do) and plan on bringing something to boil water with like either a pot or jet boil with fuel.
Lastly, you can choose your clean up method: hot water and scrubbing or a biodegradable soap option.
🥑 Food and Water
As a rule of thumb, plan to carry 2 lbs of food for each day of hiking. For example, if your next resupply point is 5 days away, you should have about 10 lbs of food in your pack. A great way to optimize your food load is to stick with options that have a high calorie-per-ounce ratio. Here are some great candidates.
As for water, it highly depends on how far water sources are from another. If water is abundant on the trail, you might get away with not carrying any water at all—simply drink at the source. If water sources are scarce however, you'll want to fill up one or two 1-L bottles and take those with you on the trail. More on this topic here.

👕 Clothes (Worn and Packed)
Climate and weather will be the biggest determinants here. This is also where layering comes in handy.
You want to pack at least one set of clothes for hiking and another set for camp (including shoes). Your hiking clothes are unavoidably going to get wet from either sweat or rain. So when you'll be done hiking for the day, you'll be glad to to have dry, warm clothes to change into.
Hiking in cold weather? You'll have to pack a few extra items to stay warm—down jacket, rain shell, wool beanie, gloves, etc.
📍 Navigation
There are many GPS, Satellite or downloadable app options to choose from for navigation. Many apps even allow you to pre-load trail maps on your phone so you can use them both on and offline.
But, how you plan your trail navigation is all about preference—and how linked into technology you want to be. If you do decide to go the tech route, it’s not a bad idea to have a backup navigation plan… just in case.
Having a compass, a map or a guidebook of the trail that marks campsites, water sources and other notable features can be a great resource.
💡 Light
Headlamps are the most popular lighting option since they allow hikers to go hands-free and are multipurpose (many have floodlights, red beams, distress signals, adjustable lighting). There are even rechargeable headlamps you can choose from.
But, there are still hikers out there that prefer the good old flashlight, lantern or tent light instead. Since lighting options come in all different shapes and sizes, some starting steps to help decide what’s right for you is to consider the desired light output level and time estimate (lumen count), beam distance, battery type, water-resistance rating and activity you’ll be using the light for.
🧼 Toiletries
Just because you’re hiking for days on end with no shower, doesn’t mean you need to forgo all of your personal hygiene rituals. Toothpaste, a toothbrush, soap, washcloths and hand sanitizer can go a long way. Biodegradable wipes can also be great for a quick wipe-down when there’s no water around. Toilet paper is always an option too.
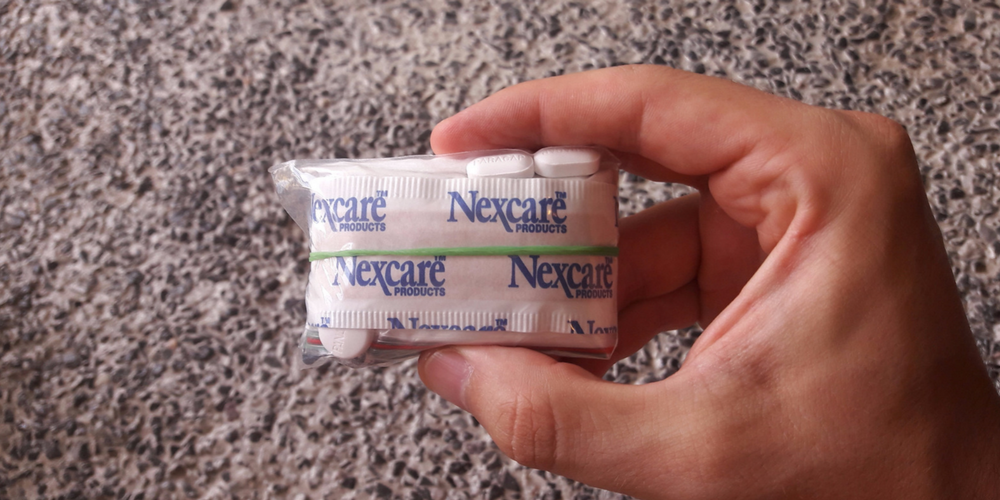
🚑 First Aid Kit
You never know what can happen on the trail. From cuts and blisters to fever, a complete first aid kit can take the worry out of your outdoor adventures. No need to overdo it though. A pair of tweezers, some gauze pads, antiseptic, band-aids and a handful of pain killers can go long way. To avoid excessive weight, repackage everything and stick to about a week's worth of supplies. If you find yourself running low, stock up at the next trail town.

🔥 Backpacking Accessories
Going hiking near a lake, or during the peak of mosquito season? Might want to bring along some bug spray. Does your hike lead into bear territory? Many parks require bear bags or canisters for overnight stays.
Ever heard how duck-tape can fix everything? It’s true, a roll can repair tears and rips and also be used as protection against an oncoming blister. A pocket knife or waterproof matches are a few other items you might want to consider packing.
☂️ Optional Extras
Depending on where you’ll be hiking, it may be valuable to pack gaiters, an ice ax, sunglasses, a sun hat, lip balm or a hiking umbrella. Some hikers even bring things like whistles, earplugs and trekking poles.
Then, there’s always the fun stuff you could bring along like a deck of cards, a journal to record your backpacking trip or a book for those evenings by the fire. What’s important to have on your thru-hike is up to you. Everyone’s experience is uniquely theirs, and after some time out on the trail you’ll pinpoint what extras you don’t want to go without.
✂️ Optimize Your Gear
Anything you can do to cut weight in your pack, do it! This could include re-packaging items, cutting off extra straps or tags on your pack or losing your toothbrush handle (who really needs that, anyway?) Whatever isn’t a necessity should get the boot, and there are tons of ways you can do this. Ultralight packing and living with the bare minimum is key here. Your back and legs will thank you.
After Your Trip
🧺 Wash and Store Your Gear
You made it! You accomplished your trip and have had the experience of a lifetime. Congrats! Now before you start celebrating there are a few things you need to do first—like properly clean, dry out and store all your backpacking gear.
When washing clothes, shoes, sleeping bag, tent, jackets, etc. stick with specifically formulated washes rather than regular detergents, and always make sure you store your supplies when they’re fully dry.
Products like Nikwax (a DWR re-waterproofing agent) and Active Wash (a wash that removes odors) work well on a variety of items. Cleaning your gear will help it last and it also gives you a good opportunity to go through and inspect it for repairs (busted seams, tears, etc.)
📖 Record Your Memories
Like anything in life, practice will make you better at it. Backpacking is the same way. After a few trips, you’ll take note of the things you can and cannot go without. After each backpacking trip, take a moment to go back to your original packing list and make notes. Add things that were vital to you and cross out others you didn’t need, and do this while the experience is still fresh in your mind so you’ll already be setting yourself up for success next time around.

 650-Calorie Fuel