From route planning to gear selection and maintenance, the following backpacking tips will help you prepare to tackle and short and longer hikes. Whether this is your first rodeo or you just need to brush up on your backpacking skills, you're in the right place.
In fact, you'll learn the very steps experienced thru-hikers go through before heading out into the wilderness for weeks or months at a time. Get ready to sleep far from the nearest trailhead.
Table of Contents
Part 1. Prepare for the Hike
- Research the weather and terrain
- Plan your route
- Plan logistics and getting to the trailhead
- Understand regulations and permits
- Make sure you are in shape
Part 2. Know Your Gear and What to Pack
- Shelter system
- Sleep system
- Cook system
- Pack
- Clothing
- Food and water
- Miscellaneous items
- Practice
- Additional weight savings tips
Part 3: On the Hike
- Pack setup
- Trail etiquette
- Safety system
- Tent setup
- Fire setup
- Scented items
- Have fun
- Final tips
Part 1: Prepare for the Hike
RESEARCH THE WEATHER AND TERRAIN
Research the average weather for the area you’re going to during the time of year you’ll be there. Knowing the daily high and low temperatures will help with planning what clothing and gear to bring. Always be prepared for some rain, but looking at a forecast will give you an idea of how much rain to expect.
-
Temperature range. Day... and night.
-
Wet or dry. Rain, desert, snow, etc.
-
Elevation. Higher elevations create more extreme conditions.
 ©
©
PLAN YOUR ROUTE
📍 Search For A Route. Pick somewhere reasonably close to your home for your first trip. That way, you’ll be able to spend more time hiking and camping than you spend traveling to your destination. There is a multitude of apps you can use for backcountry navigation and route planning (you can start with Alltrails). Use these, along with paper maps to plan your route.
Do an online search for national forests, wilderness, or BLM (Bureau of Land Management) land near you. Once you’ve found a location to go backpacking, you’ll want to figure out your route. Try searching “weekend backpacking route in [area you’re going to]” to see what you find.
🗺 Understand How You Are Going to Navigate. You can also create your own route. With your map, find the trailhead you plan to start from. Look for landmarks you want to visit on your hike, along with water sources and campsites. Create a route that connects those together. Be sure to obtain up-to-date information on seasonal water sources before you head out.
⏱ Plan Your Pace. For beginners, a route that covers between 5 and 10 miles per day is a good distance to plan for. Err on the side of less mileage, especially at first. Getting to camp early is never a bad thing. If you get to camp early you can explore more after you set up.
Also, plan for it to take longer if you’re going on a trail with lots of elevation gain and loss. For every 1,000 feet of elevation gain, add another hour to your hiking time. If a trail is especially rocky or has lots of tree roots it will also take longer to hike.
To calculate the distance you can cover in a day or over the course of your entire trip, use the following calculator:
PLAN LOGISTICS AND GETTING TO THE TRAILHEAD
🔁 Loop and Out-and-Back. If your beginning and end points are the same, the only travel arrangements you’ll have to make are getting to the trailhead. If you have a car, this is easy. Even if you don’t have a car, you can likely take an Uber, taxi, or bus to the trailhead. Also, try checking internet groups for local trail angels who might be able to give you a ride.
➡️ Point-to-Point. If your route is point to point, meaning it starts and ends in a different location, you’ll have to figure out how to get back to where you started. You might be able to hitchhike back there. If you can’t do that, make arrangements for getting back, too.
Traveling out of state for a trip will require even more planning. Book a flight, or look up buses and trains to the nearest town. From there, you’ll have to figure out how to get to the trailhead.
UNDERSTAND REGULATIONS AND PERMITS
Check the relevant land management agency’s website to see if any permits are required for where you plan to go. You might need to adjust your plan if you don’t apply for permits early enough.
Make sure there aren’t any trail closures where you’re headed. And, check if there are other special requirements for backpacking at your destination. If you’re staying in a shelter or at a campground, you might need to make a reservation, too.
-
Is the area open for overnight camping?
-
Do you need to make a reservation to stay overnight?
-
Is there parking available?
-
Other permits? To make a fire, need a bear canister, etc?
 Appalachian Trail trail closures as indicated on NPS.gov
FITNESS = MAKE SURE YOU ARE IN SHAPE
To begin preparing for your hike, make sure you’re physically fit enough to handle walking with a loaded pack. Go hiking with your backpacking gear, even if it's just around your neighborhood.
If you have a long hike planned, try walking the distance you plan to walk every day (eg. 10 miles). If that sounds challenging, work your way up to it. Start walking shorter distances, without your loaded pack, and add miles and weight as you get stronger.
Jogging is a great way to build the cardiovascular endurance you’ll need. Aim at jogging a mile without stopping. If you can’t jog a mile, try the run-walk technique. Run for 30 seconds and walk for 90 seconds. As you get in better shape you can lengthen the time spent running and shorten your walking time.
Part 2. Know Your Gear and What to Pack
Next, round up all the gear you need for your trip. This could get expensive if you don’t yet have everything. Depending on how committed to backpacking you are, you may want to borrow some items.
SHELTER SYSTEM = UNDERSTAND BASIC TENT OPTIONS
This is probably the most important piece of backpacking gear. There are three main varieties of shelters to choose from: freestanding tents, non-freestanding trekking poles tents, and tarps.
-
Freestanding tents: tend to be the heaviest but also the most comfortable. They are double-walled, with an interior bug mesh and an exterior waterproof rainfly. And, they use dedicated tent poles to set up. Freestanding tents do not have to be staked into the ground, hence the name “freestanding.” They are the least prone to condensation of all tent varieties. This also makes them the best in stormy conditions. Bugs won’t be able to get at you inside of the fully enclosed bug net interior of the tent, either.
-
Non-freestanding tents: usually single-walled, which means they don’t have an inner mesh. These tents use trekking poles and tension held by tent stakes to set up. This cuts down significantly on weight. However, these tents are more prone to condensation. And, if you get to camp early and set up your tent, you won’t be able to use your trekking poles to explore.
-
Tarps: the lightest shelter option available. They also set up with trekking poles and tension. Tarps provide the least protection from the elements, though. And since they have no floor, you’ll need to bring a groundsheet, a piece of Polycryo or Tyvek. If you’re expecting heavy rain or snow, a tarp might not be the best option. But if your destination is usually dry, tarps are a great way to save weight.
If you need help choosing an ultralight tent, check out this guide where we reviewed some of our favorite models.
 Eating dinner in a non-freestanding tent. Notice the trekking pole holding the structure up.
SLEEP SYSTEM = SLEEPING BAG + PAD
Your sleep system consists of a sleeping bag or quilt and a sleeping pad. Your bag insulates you from above, and your pad keeps you off the ground. This keeps you comfortable and insulates you from below. Some hikers also like to bring along an inflatable or compressible pillow.
🛌 Sleeping bag vs quilt. Sleeping bags usually have a zipper and a hood. They surround your entire body and provide great insulation from top to bottom. They're the equivalent of sleeping wrapped up in a warm, cozy blanket. A good ultralight bag can be expensive though. To save weight and money on a sleeping bag, you can get a backpacking quilt instead. Quilts are sleeping bags without all the extra stuff. They have no zipper and use a strap system to hold them down around you. Since they're backless, you lie directly on your pad. This means you rely on your sleeping pad to insulate underneath you.
🪶 Synthetic vs. Down Insulation. Sleeping bags and quilts use natural down or synthetic insulation to keep you warm. Down generally has a higher warmth to weight ratio than synthetic insulation, but can lose insulating properties when wet. Synthetic insulation will work better when wet but is heavier. Synthetic insulation is often cheaper, too.
🌡 Temperature rating. A good rule of thumb is to get a bag which temperature rating is at least 20 degrees below the temperatures you're going to be sleeping in. But if you're looking for a good all-around temperature rating, 20F is a good choice, no matter the insulation.
💤 Sleeping pads. Sleeping pads come in two basic varieties: closed cell foam and inflatable. Closed cell foam pads are generally more durable and cheaper. But, they’re not as warm and they do not pack down as small. Most people find inflatable pads to be more comfortable and warmer. However, a single puncture can turn your plush backcountry camping experience into a cold night sleeping on the ground. Check out our favorite ultralight sleeping pads.
 A classic sleep system includes a quilt (or sleeping bag) and a sleeping pad.
COOK SYSTEM = STOVE + FUEL + UTENSILS
A small 700-900 mL pot, a stove with the proper fuel, and an eating utensil are all you’ll need for a single person backcountry cook system. Most ultralight backpackers will eat and drink directly out of their pot. If you’re sharing a cooking system with a partner, you might need a bigger pot.
-
Canister stove: the most popular types of backpacking stoves use small isobutane fuel canisters you can buy at outdoor stores. These stoves are small, light, and boil water quickly. The steel fuel canisters can be hard to judge how full they are, though. They also are not refillable.
-
Alcohol stove: The other most popular types of backpacking stoves burn alcohol. These are very light and easy to make yourself. Their fuel source is available at most hardware stores, gas stations, and pharmacies. However, alcohol stoves do not have an off switch, so they are not allowed anywhere that has a fire ban.
-
Utensil: A spoon or spork is the most common eating utensil backpackers bring in their cook kit. Get one made of aluminum, plastic, or titanium to save weight. Aluminum and plastic utensils will be the cheapest, but will not last as long as titanium.
 Credit: travelight.cz
PACK = PACK + COVER (OR LINER)
After you have all of your large gear items you can get a pack. You’ll want something just big enough to fit all your backpacking gear plus food. So, it’s good to wait until you know how big that is. Backpacking packs come in three main varieties: internal frame, external frame, and frameless. Don't forget to pack a pack cover or a pack liner to make sure nothing gets wet.
-
Internal frame packs: strike a balance between comfort and weight. Therefore, they’re usually the best option for new backpackers. An internal frame pack made with ultralight materials can weigh less than two pounds. They come in volumes ranging from 40 to 60+ liters, too.
-
External frame packs: good for heavy loads and strapping extra things to the frame. They’re designed to hold a lot of weight comfortably. If you’re going on overnight hunting trips or bringing a lot of tools with you, this will be the most comfortable. For recreational backpacking, they are likely overkill, though. Here are some of the best external frame packs being made today.
-
Frameless packs: if you have a very low base weight, you can keep that low by getting a frameless pack. These packs can weigh less than a pound. Frameless packs are usually not the right option for beginner backpackers. But, if you have a base weight below 10 pounds, a frameless pack can work for you.
Here’s an example of a full gear list organized on Packfire.
 Different styles of modern lightweight backpacks
CLOTHING = LAYERING
At a minimum, you’ll want a main hiking outfit along with a rain jacket and lightweight insulated jacket for your backpacking trip. If you expect colder temperatures or a lot of rain, you’ll need to bring more clothes than that.
Bring clothes that you can layer. That way, as you get warmer or colder throughout the day you can easily regulate your temperature.
Shorts with wind pants to pull over them for colder temperatures are a common summer layering system. For your torso, your main hiking shirt can be layered with a lightweight fleece over it.
And, when it’s really cold, you can put your rain jacket over that. Add a lightweight beanie and gloves, and this layering system can keep you warm hiking in temperatures down to 30F.
If you expect a lot of rain, bring rain pants or a rain skirt as well.

Simple backpacking layering system for rainy weather.
👕 Fabrics. Wool clothing is best for keeping you warm when wet. And, wool breathes very well. A thin wool shirt is a great option for a hiking shirt you can layer over. Synthetic polyester layers are also good for hiking shirts. They dry quickly and regulate body temperature well.
🩴 Camp Clothes. Sleep clothes and camp shoes are nice if you’re going to be hiking in the rain. You’ll be carrying them, so make sure those items are lightweight. A set of base layers and lightweight camp shoes are a good choice.
👟 Footwear. Wear shoes you like to hike in for backpacking. If you like hiking in boots, wear boots. If you like hiking in trail runners, wear trail runners. Trail runners are less supportive than boots, though. Be sure you’ve tested hiking in them with your loaded pack. Don’t forget a few pairs of socks - at least two for hiking and one for sleeping. Wool is the best material for socks since they’re resistant to odors.
 ©
©
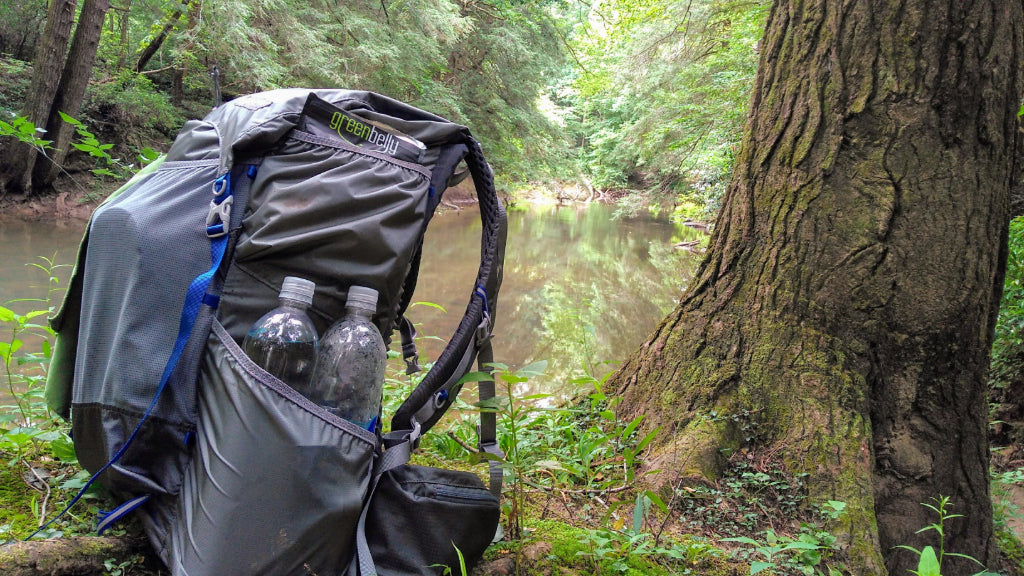
FOOD AND WATER
🗓 Plan by Meal. Bring enough meals for every breakfast, lunch, and dinner you’ll be out, plus snacks for in between meals. Make sure you have enough calories per day (2,000 minimum, potentially several thousand).
🍽 What to Look For. The easiest meal planning is to buy pre-packaged backpacking meals. Easy to make and easy to clean up. However, there are other more affordable options. Pretty much any dried meal in the grocery store aisles labeled “instant” can be cooked while backpacking. Avoid bringing cans of food or anything with water in it. The extra water adds unnecessary weight to your pack.
👩🍳 Food Suggestions. For more calories and flavor, add dehydrated veggies, cured meat, a tuna packet, cheese, or avocado. Cereal and powdered milk, oatmeal, or bagels, and cream cheese are great breakfast options. Additions such as powdered milk, nut butter, dried fruit, nuts, coconut, and protein powders can make those oats more interesting, too.
Cold lunches are popular with backpackers for simplicity:
- Tortilla or bagel with cured meat, cheese, hummus, avocado, etc.
- Meal bars and granola bars (read 7 Best Meal Bars)
- Trail mix
- Nut butters
- Chips (much more calorically dense than bread)
💧 Know Your Water Sources. You can pack all of the water you are going to drink for your trip (easy if it is short). Otherwise, you will have to collect water on your trip from streams, lakes, spring, etc. A lightweight water filter or another way to purify it is a necessity. Be sure to test your water filtration method before you head out.

MISCELLANEOUS ITEMS = OTHERS TO CONSIDER
🪥 Toileteries. There are a few other necessary items to bring backpacking. A toothbrush, toothpaste, and any other needed toiletries should be packed. A travel-sized tube of toothpaste is sufficient. A small towel will prove to be very useful as well.
🩹 First Aid. Be sure to bring a first aid kit too. You don’t need to go crazy with the first aid kit, but be prepared. Think treating blisters, diarrhea, allergic reactions, small cuts, aches, and pains mostly. You can buy an ultralight kit or make your own.
🔦 Headlamp. A headlamp will be useful for lighting up small things at camp and occasionally walk to a nearby water source. Here’s an article that breaks down some of the best ultralight headlamps.
PRACTICE = GET COMFORTABLE WITH YOUR SETUP
The last thing you want to do is use anything for the first time in the backcountry. Practice setting up camp in your yard. If you don’t have a yard, improvise by setting up camp inside and at least sleeping in your tent.
When you’re out day hiking with your backpacking gear, get used to using your gear. When you stop for a lunch break, practice looking for a flat spot to set up your tent. Now, set up your tent and take your lunch break. When you’re finished with lunch, break down camp and repack your bag.
If you practice setting up camp enough, you’ll figure out if you need something you haven’t packed. More than likely, though, you’ll notice you haven’t used something. Examine that item, do you really need it? Every ounce counts when you’re carrying it on your back all day.
ADDITIONAL WEIGHT SAVINGS TIPS
If possible, keep your pack light. This will improve your energy efficiency on the trail and reduce the toll hiking has on your body. A lighter load will also make you more mobile and protect you against some of the common hiking injuries like a rolled ankle or a painful fall. Lastly, the less you pack, the less items you'll have to pack, organize, and search through while on the trail.
Keep the weight of your “big 3” (tent, sleep system, and backpack) low as those will be the heaviest items in your pack and you'll be half way there.
If you want to nerd out and hack down your pack weight, check out these 41 ultralight tips.
 ©
© Part 3: On the Hike
PACK SETUP
The more often you’re going to use something, the easier it should be to access.
-
Bottom of the Pack. Put everything you won’t need until setting up camp in your pack first. Start by stuffing your sleeping bag into the bottom of your pack. Now put your tent, sleeping pad, and camp clothes on top of your sleeping bag, along your back. This keeps your heaviest items in the middle of your pack.
-
Middle of the Pack. Now, stuff everything else into the rest of the space. If you have a lot of food, put some of it down lower in your pack. Keep the food you’ll want to eat throughout the day near the top so you can easily grab it.
-
Top of the Pack and Pockets. It is best to keep things you’ll be using frequently within reach without taking your pack off at all. Keep any navigation devices, sunscreen, chapstick, and snacks on your shoulder straps or in hip belt pockets.
If you can reach the side pockets on your pack, the easiest way to handle your water setup is to keep all your water outside your pack in those pockets. If you can’t reach your side pockets or just prefer to use a water bladder for carrying and drinking water, you’ll have a harder time knowing how much water you have. And, it’s pretty hard sliding a full water bladder into a fully packed backpack.
More on how to pack a backpack.
TRAIL ETIQUETTE
🧹 Leave No Trace. Follow these seven Leave No Trace Principles when you’re out backpacking, on day hikes, anytime you’re recreating outside:
- Plan ahead and prepare
- Travel and camp on durable surfaces
- Dispose of waste properly
- Leave what you find
- Minimize campfire impacts
- Respect wildlife
- Be considerate of others
💩 Poop. Poop should be buried in a 6-inch cat hole, at least 200 feet away from water, campsites, and trails. And, don’t bury your toilet paper. (Yes, even if it's biodegradable.) Keep your used toilet paper in a separate ziplock bag with your bathroom kit. It’s really not bad.
🧼 Soap. Avoid getting any soap or food scraps into water sources, no matter how eco-friendly and natural your soap might be. You can usually get your dishes or yourself clean without soap by scrubbing with warm water or sand.
 Different backpacking soap options
SAFETY SYSTEM
📞 Communicate. If you’re hiking alone, be sure to have a buddy back home that knows your itinerary. Regularly check in with your buddy when you’re able to.
📝 Logs. Some shelters and campsites have logs that allow hikers to check in along a trail. Make sure to fill them out so that people know where to look for you in case you go missing.
📡 Beacon. Consider getting a backcountry beacon or satellite messenger to send out an alert and get help even when you don't have signal.
TENT SETUP
🌿 Leave No Trace. To preserve the landscape, look for a flat spot that’s already been camped on when you’re looking to pitch your tent. Set up camp at least 200 feet away from streams and other water sources.
🌳 Trees. Inspect the trees around you. Pick a spot away from dead trees as a dead branch (aka widowmaker) could fall and hurt you.
⛈ Weather. Lastly, be mindful of the weather when choosing your campsite location. You don't want to wake up in a puddle of rain or have your collapse in the middle of the night. Seek elevated ground, find a spot protected from the wind, and watch out for lightning.
FIRE SETUP
🔥 Fire location. The best place to have a fire is in established fire rings and at least 15 feet away from your tent. If you must have a fire where there is no ring, keep it small and only burning when you’re nearby.
💨 Wind. Do not start a fire in windy conditions as this may cause your tinder to fly away and the fire to spread.
🪵 How To. You'll need to gather some kindling, place a bundle of tinder at the base of your setup, and use a lighter, matches, or your fire starter of choice to ignite the fire.
💦 Safety. Drown coals in water when you’re done and wait until the fire is completely out before leaving. Scatter cold ashes over a large area so no one can tell you had a fire there.
If there's a fire ban in your region, don’t build a campfire.
SCENTED ITEMS
🍗 Food Storage. Store all scented items (eg. toiletries) and your food at night and keep them at at least 200 feet from your campsite. This will keep bears, squirrels, and other wildlife away from your tent. You can use a hard-sided bear canister (required in some locations) or hang your food out of reach using a bear hang.
🐻 Bear Safety. If you’re in Grizzly territory, carry bear spray. If you encounter a Grizzly, calmly back away while keeping your eye on it. Chances are, the bear doesn’t want or fight or eat you, and you’ll be able to give it space without any problems. Only use bear spray as a last resort if a Grizzly comes at you.
HAVE FUN
Have fun on your backpacking trip! After you’ve hiked all day, read an ebook downloaded to your phone, listen to music, drink tea and talk about life, or play a trail game.
FINAL TIPS
Before you head out, know which poisonous plants to watch out for in your environment. It’s also good to know some basic knots for backpacking and be able to recognize common animal tracks.